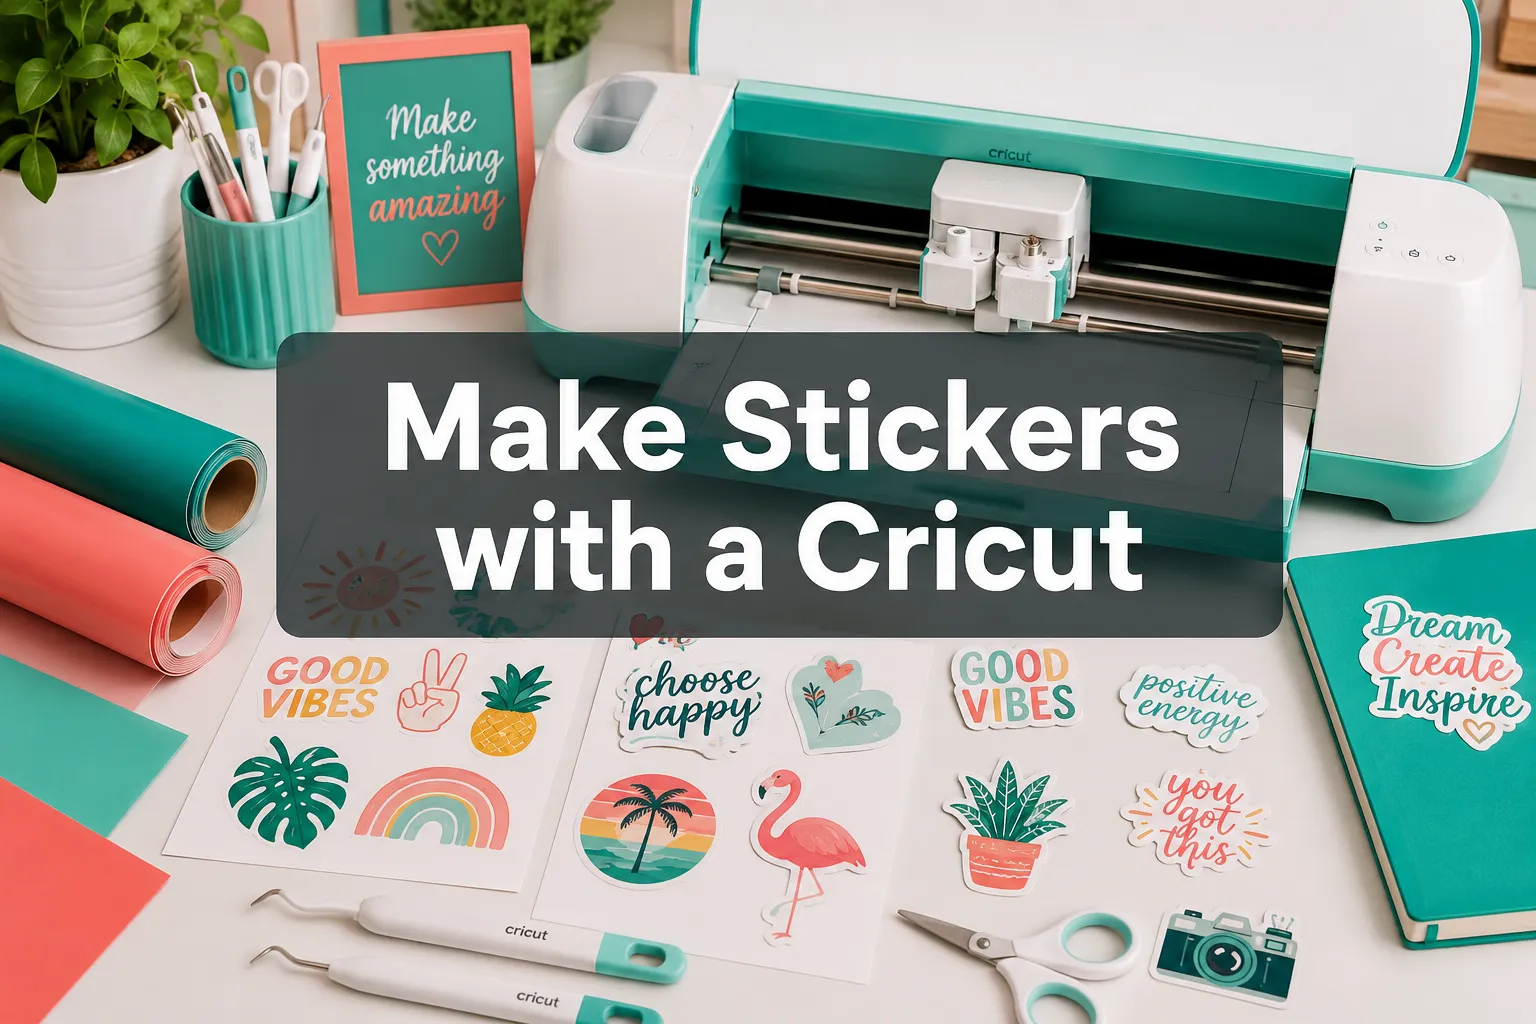
How to Make Stickers with a Cricut: Beginner’s Guide
How to Make Stickers with a Cricut?
Quick Answer: Making stickers with a Cricut involves designing artwork in Cricut Design Space, printing or cutting your design on sticker paper or vinyl, and then weeding away the excess material. The process takes roughly 30 to 60 minutes for a beginner’s first batch and requires no advanced crafting skills. Both print-then-cut stickers and pure vinyl stickers are possible with the same machine.
Table of Contents
Key Takeaways
- A Cricut Explore Air 2, Cricut Maker 3, or Cricut Joy can all make stickers, the best choice depends on your project size and budget.
- Two main methods exist: Print Then Cut (for full-color illustrated stickers) and vinyl cutting (for solid-color or layered designs).
- Essential materials include sticker paper or vinyl, a cutting mat, a weeding tool, and optionally a laminate sheet or Mod Podge for sealing.
- Cricut Design Space is the free software used to design and send cuts, no third-party subscription is required to get started.
- Waterproof stickers require either printable vinyl or a laminate layer over standard sticker paper.
- Beginner cost to start: roughly $50 to $150 for a basic setup, not counting the machine itself.
- The most common beginner mistake is skipping the test cut, which wastes full sheets of material.
- Sealed, laminated Cricut stickers can last two to five years on surfaces like water bottles and laptops (estimate based on typical vinyl durability under normal use).
What Is the Best Cricut Machine for Making Stickers
Any current Cricut machine can make stickers, but the right choice depends on volume and design complexity. For most beginners, the Cricut Explore Air 2 or Cricut Explore 3 offers the best balance of affordability and capability. The Cricut Maker 3 handles thicker materials and is worth the extra cost only if sticker-making is part of a broader crafting hobby.
- Cricut Joy: Compact and budget-friendly, but limited to 4.5-inch-wide cuts, fine for small sticker sheets, not ideal for large prints.
- Cricut Explore Air 2 / Explore 3: Cuts up to 12 inches wide, supports Print Then Cut, and handles vinyl, sticker paper, and laminate. Best for most beginners.
- Cricut Maker 3: Same sticker capability as the Explore 3 but with adaptive tool system for heavier materials. Overkill for stickers alone.
For a deeper comparison of models before buying, see Which Cricut Should I Buy and What Is a Cricut Machine.
What Materials Do You Need to Make Stickers with a Cricut
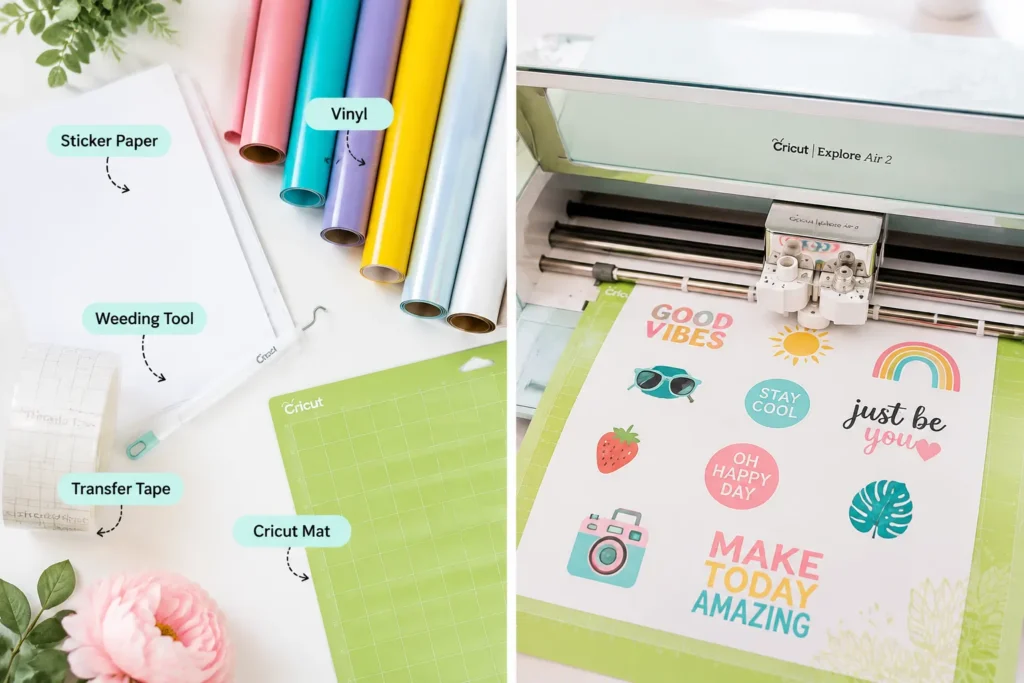
The materials list is short and affordable. For Print Then Cut stickers, you need printable sticker paper and an inkjet printer. For vinyl stickers, you need adhesive vinyl and transfer tape.
Core materials:
- Printable sticker paper (matte or glossy), for full-color designs
- Adhesive vinyl (permanent or removable), for solid-color or layered stickers
- Cricut cutting mat (LightGrip for sticker paper, StandardGrip for vinyl)
- Weeding tool (to remove excess material)
- Scissors or a craft knife
- Inkjet printer (for Print Then Cut method only)
Optional but recommended:
- Clear laminate sheets or spray laminate, adds waterproofing and durability
- Transfer tape, needed for vinyl stickers to move them from backing to surface
- Brayer or scraper tool, helps press stickers down cleanly
What Is the Difference Between Permanent and Removable Vinyl for Stickers
Permanent vinyl has a stronger adhesive designed for long-term outdoor use on hard surfaces like water bottles, car windows, and laptops. Removable vinyl uses a lighter adhesive that peels off cleanly without leaving residue, making it ideal for wall decals, temporary labels, or surfaces you don’t want to damage.
Choose permanent vinyl if: the sticker will go on a water bottle, outdoor gear, a car bumper, or any surface exposed to moisture or sunlight.
Choose removable vinyl if: the sticker is decorative, temporary, or going on a painted wall, rental property surface, or product packaging.
Both types cut the same way in Cricut Design Space, the material setting is the only difference.
Do You Need Special Software to Design Stickers for Cricut
No paid software is required. Cricut Design Space is the free browser-based and desktop app that handles all design and cutting instructions. It works on Windows, Mac, iOS, and Android.
Within Design Space, you can:
- Upload your own artwork (PNG, SVG, JPG, DXF formats)
- Use built-in fonts and shapes
- Set up the Print Then Cut feature for full-color stickers
- Adjust cut lines, bleed, and offset for clean sticker borders
For more complex original artwork, many creators design in Canva, Adobe Illustrator, or Procreate first, then export the file as a PNG or SVG and import it into Design Space. That workflow is optional, Design Space alone is sufficient for most beginner sticker projects.
How to Make Stickers with a Cricut: Step-by-Step
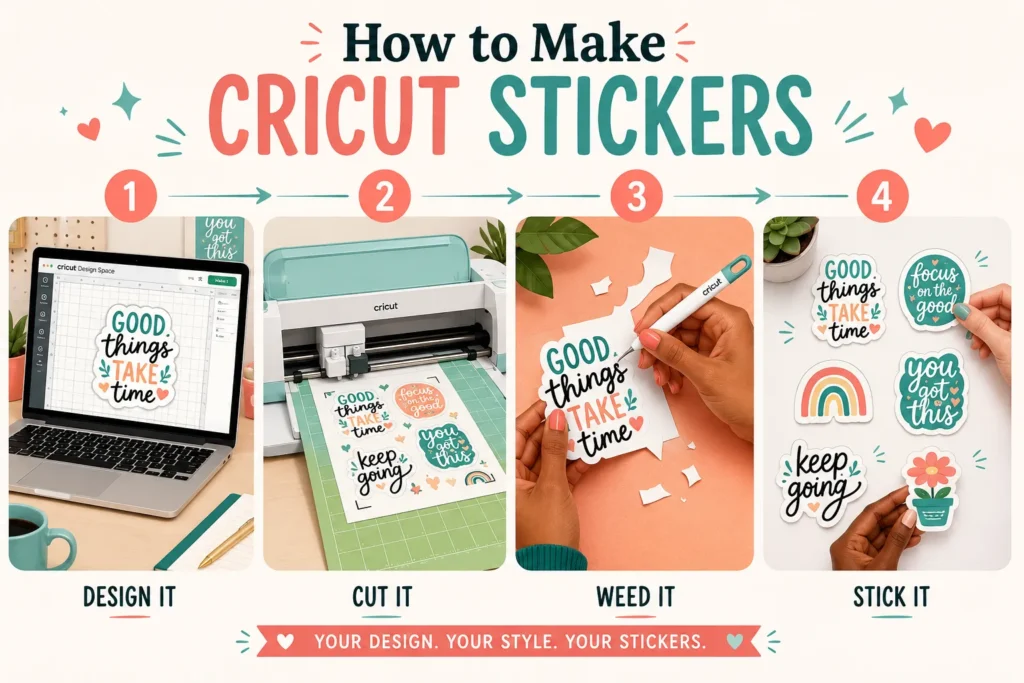
Making stickers with a Cricut follows a consistent process regardless of design complexity. Here are the core steps for the Print Then Cut method, which is the most popular approach for beginners.
Step 1: Create or upload your design in Cricut Design Space
Open Design Space and start a new project. Upload a PNG image with a transparent background, or build a design using the built-in tools. For sticker sheets, arrange multiple designs on one canvas to save material.
Step 2: Add an offset (sticker border)
Select your image, click “Offset” in the toolbar, and set a small offset (0.05 to 0.1 inches works well). This creates a white or colored border around the design, the classic sticker look.
Step 3: Set the layer to “Print Then Cut”
In the Layers panel, make sure your design is set to Print Then Cut. Design Space will send the design to your printer first, then use the Cricut’s sensor to cut precisely around the printed image.
Step 4: Print the design
Load your sticker paper into the inkjet printer. Click “Send to Printer” in Design Space and print at the highest quality setting. Let the ink dry for two to three minutes before handling.
Step 5: Load the mat and cut
Place the printed sticker sheet face-up on the LightGrip mat. Load it into the Cricut. Select “Sticker Paper, Glossy” or “Sticker Paper, Matte” as the material setting and press the flashing button to cut.
Step 6: Weed and finish
Once the cut is complete, unload the mat. Use a weeding tool to remove any excess paper from around the stickers. If laminating, apply a clear laminate sheet before cutting, or spray with laminate after.
Can You Use Regular Paper to Make Stickers with a Cricut
Regular printer paper is not adhesive, so it cannot function as a sticker on its own. However, there is a workaround: print your design on regular paper, then apply a sheet of clear contact paper or double-sided adhesive sheet to the back before cutting. This creates a functional sticker, though the adhesive quality is lower than dedicated sticker paper.
For best results, use purpose-made printable sticker paper. A pack of 25 sheets costs roughly $8 to $15 at most craft stores or online retailers, making it an affordable upgrade over the contact-paper workaround.
How to Make Vinyl Stickers with a Cricut
Vinyl stickers skip the printing step entirely and work best for bold, single-color or layered designs like monograms, logos, and text. The process is slightly different from Print Then Cut.
- Design your artwork in Design Space using solid shapes and text (no gradients or photographic images).
- Set the material to your vinyl type (permanent or removable).
- Place the vinyl sheet face-up on a StandardGrip mat and load it.
- Cut, then weed away the negative space using a weeding tool.
- Cut a piece of transfer tape slightly larger than the design.
- Press the transfer tape over the weeded vinyl, rub firmly with a scraper, then peel the tape and vinyl away from the backing together.
- Position on the target surface, press down firmly, and slowly peel the transfer tape away at a 45-degree angle.
Can You Make Waterproof Stickers with a Cricut
Yes. Waterproof Cricut stickers are achievable through two methods. The first is to print on printable vinyl rather than paper-based sticker paper, printable vinyl is water-resistant by nature. The second method is to print on standard sticker paper and then laminate with a clear adhesive laminate sheet or a waterproof spray sealant before cutting.
Adhesive vinyl (non-printed) is already waterproof and does not need sealing.
How to Seal Stickers Made with a Cricut to Make Them Last Longer
Sealing protects the ink from scratching, moisture, and UV fading. The two most practical sealing methods for Cricut stickers are:
- Laminate sheets: Apply a clear adhesive laminate sheet over the entire printed sticker sheet before running it through the Cricut. The machine cuts through both layers at once. This is the cleanest method.
- Spray sealant (Mod Podge or acrylic spray): Apply two to three thin coats over the finished sticker sheet, letting each coat dry fully. This works well for stickers that have already been cut.
Avoid using liquid Mod Podge brushed directly on inkjet prints, it can smear the ink. Use the spray version or let inkjet ink cure for at least 24 hours first.
How Much Does It Cost to Make Stickers with a Cricut
The machine is the largest upfront cost. Beyond that, per-sticker material costs are low.
Estimated startup costs (excluding the machine):
- Printable sticker paper (25 sheets): $8,$15
- LightGrip cutting mat: $8,$12
- Weeding tool set: $8,$15
- Laminate sheets (optional): $10,$20
Total starter supply cost: roughly $35 to $60 for the first batch.
Per sticker, the material cost is typically under $0.10 to $0.25 depending on sheet size and design density. This makes homemade Cricut stickers significantly cheaper than ordering custom stickers from a print shop, especially for small quantities.
How Long Do Homemade Cricut Stickers Last
Unlaminated stickers on paper stock typically last six to twelve months before edges lift or colors fade, especially with moisture exposure. Laminated stickers on printable vinyl, applied to a clean hard surface, can last two to five years under normal indoor or light outdoor use (this is an estimate based on typical adhesive vinyl durability ratings from manufacturers).
Factors that shorten sticker life:
- Applying to a dirty, oily, or textured surface
- Skipping the laminate layer
- Prolonged direct sunlight exposure
- Dishwasher use (even “waterproof” stickers degrade faster in the dishwasher)
Why Aren’t My Cricut Stickers Sticking
Poor adhesion is almost always a surface preparation issue or a material mismatch. Before applying any sticker, clean the surface with rubbing alcohol and let it dry completely. Oils, dust, and residue from previous adhesives all prevent a clean bond.
Other common causes:
- Removable vinyl used on a rough or porous surface, removable vinyl needs a smooth, non-porous surface to grip properly.
- Sticker applied in cold temperatures, adhesives activate best at room temperature (65-75°F). Cold surfaces reduce initial tack.
- Backing paper left on too long after cutting, over time, the adhesive can transfer partially to the backing. Use stickers within a few weeks of cutting.
- Laminate applied before the ink was fully dry, this traps moisture and weakens the adhesive bond.
What Mistakes to Avoid When Making Cricut Stickers
Beginners consistently run into the same handful of problems. Avoiding these saves both material and frustration.
- Skipping the test cut: Always run a small test cut on a scrap piece before committing a full sheet. A blade that’s too deep or too shallow ruins an entire print.
- Not mirroring vinyl designs: When cutting iron-on vinyl (HTV), designs must be mirrored before cutting. For standard adhesive vinyl stickers, mirroring is not needed, but confusing the two is a common error.
- Ignoring the registration marks: For Print Then Cut, the Cricut uses black registration marks to align the cut. If those marks are cut off, smeared, or printed too faintly, the cut will be misaligned. Always print at full quality and leave the registration marks intact.
- Cutting too fast through thick laminate: Slow down the cut speed or increase pressure when cutting through laminated sticker sheets. A single pass at standard settings often doesn’t cut cleanly through the laminate layer.
- Using an old or dirty mat: A mat that has lost its tack will let the material shift mid-cut, ruining alignment. Clean mats regularly with a lint roller or replace them when they no longer hold material firmly.
For a broader understanding of how the machine handles these operations, How Does a Cricut Work covers the mechanics in detail.
FAQ
Can a Cricut make stickers without a printer?
Yes. Using adhesive vinyl and the standard cutting method, a Cricut cuts solid-color stickers without any printer. The Print Then Cut method requires a printer, but vinyl-only stickers do not.
What is the easiest way to apply stickers made with a Cricut?
Clean the surface with rubbing alcohol, let it dry, then peel the sticker backing slowly and press from the center outward to avoid air bubbles. Use a credit card or scraper to smooth out any bubbles after applying.
Can I sell stickers made with a Cricut?
Yes, as long as the designs are original or properly licensed. Selling stickers made from copyrighted characters or brand logos without a license is a legal risk regardless of the machine used.
What file format works best for sticker designs in Cricut Design Space?
SVG files preserve clean edges and scale without quality loss, making them ideal for vinyl cuts. PNG files with transparent backgrounds work best for Print Then Cut sticker designs.
Do I need Cricut Access to make stickers?
No. Cricut Access is a paid subscription that unlocks premium fonts and images in Design Space. You can upload your own artwork and make stickers entirely without a subscription.
How do I make kiss-cut vs. die-cut stickers with a Cricut?
Kiss-cut stickers cut through only the sticker layer, leaving the backing intact (the sticker peels off a sheet). Die-cut stickers are cut all the way through, resulting in individual stickers with no backing sheet. Adjust the cut pressure in Design Space to control which result you get.
Can the Cricut Joy make stickers?
Yes, but it is limited to a 4.5-inch cut width. It supports both vinyl cutting and Print Then Cut for small sticker projects. It is not ideal for full-page sticker sheets.
What is the best sticker paper for Cricut beginners?
Matte printable sticker paper is the most forgiving for beginners because it feeds through printers easily and shows ink colors accurately. Glossy paper produces more vibrant colors but is slightly harder to handle without fingerprints.
Conclusion
Learning how to make stickers with a Cricut is one of the most accessible entry points into the broader world of Cricut crafting. The process is straightforward: design in Cricut Design Space, print or cut your material, weed the excess, and seal for durability. The startup cost is low, the learning curve is short, and the results are professional enough to sell or gift.
Actionable next steps:
- If you don’t yet own a machine, use the guide at Which Cricut Should I Buy to narrow down the right model for your budget and goals.
- Pick up a pack of matte printable sticker paper and a LightGrip mat as your first supply purchase.
- Open Cricut Design Space, start a free account, and run a Print Then Cut test with a simple shape before investing in a full design.
- Once comfortable with the basics, experiment with laminate sheets to extend sticker life and explore adhesive vinyl for bolder, single-color designs.
The first batch won’t be perfect, but by the second or third, the process becomes second nature.